
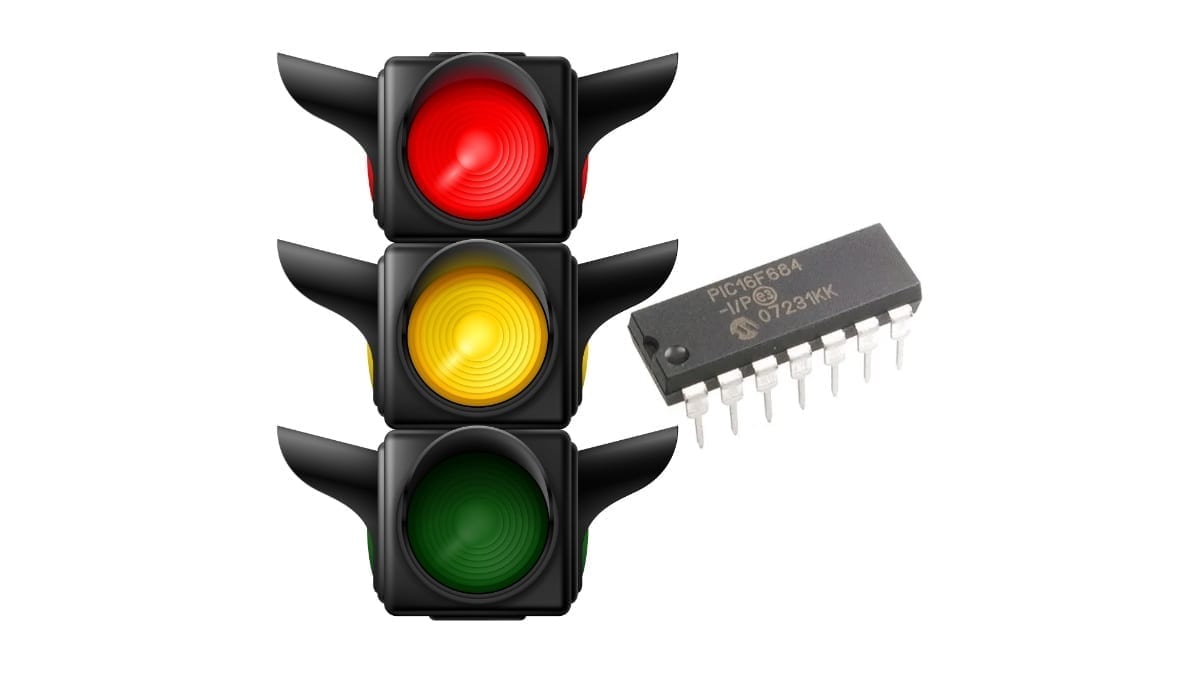
Multiplexing is a important tool for improving the maneuverability of sequential hardware (such as traffic lights) and for reducing the number of pins required in a PIC microcontroller. In a previous post called Multiplexing Principles, this benefits were explained in further detail. Moreover, this post will implement a multiplexing traffic lights with a PIC microcontroller. In order to learn how to do it yourself, keep reading. At the bottom you find a form to download the code. Timer 0 and Timer 1 are used.
Before reading this, you will need to know how to setup MPLAB IDE and how to connect the PICkit to the PIC microcontroller. If not, check them out first. Check out also another projects for beginners in 8-bit PIC microcontrollers.
Table of Contents
Requirements for Multiplexing Traffic Lights
Components and Devices
In this tutorial, all the components are Through Hole.
- PIC16F684: 1 unit.
- LED, any size and preferably red, yellow and green colors: 12 units.
- Resistors:
- 330Ω, 1/2 or 1/4W: 12 units.
- 1KΩ, 1/2 or 1/4W: 4 units.
- BJT Transistors:
- 2n3904 or 2n3906: 4 units.


PIC microcontroller
For this tutorial, I will use the 8-bit microcontroller PIC16F684. This one is the very first one that I learned to program. Very practical too. Be sure to select Through Hole or ‘TH' version. Surface Mounted won't fit in the breadboard.

Download the datasheet here. I recommend that you print in reduced A4 all the datasheet because it will serve you as quick reference.
Tools and Machinery
- Breadboard: 1 unit.
- PICkit (3 or 4): 1 unit.
- AC/DC Power Adapter to 5V DC, with at least 500mA: 1 unit.
- Jumper or UTP Wires: various.


The reason behind Multiplexing
Multiplexing is attractive for displays, lights and other indicators. It reduces the physical pins required for the circuit and increases its expandability; thus, it becomes modular.
If you have read about the article, click here to read it first.
Schematics for Multiplexing Traffic Lights
Let's design the schematic for this circuit, and then implement it in the breadboard.
Schematic for the PIC microcontroller
The circuit requires a few assignments of pins. First, the PICkit pins and the 32768Hz Oscillator for Timer 1. This pins are reserved and they cannot be changed. Second, the 4 pins to indicate the state of the traffic lights (P1 -> P4), each one. Finally, 3 pins to indicate the state of the lights (RED, YELLOW, GREEN). For the information of the traffic light, we require 7 pins in total. Port C have general purpose pins, so let's use them first. Since Port C has only 6 pins, let's use the pin 2 of Port A for the state of GREEN.
Schematic for the Multiplexed Traffic Lights
In order to turn on and off each traffic light, one transistor is assigned to each one. The base of the transistor goes in series with a 1KΩ resistor and then connected to the pins P1->P4 of the PIC microcontroller. The LEDs (with the 330Ω resistor) are connected to its respective color. For example, R1, R5, R9 and R13 are all connected to pin RC4 and therefore creating the RED node. This is called a bus network.
Schematic Gallery


Code for Multiplexing Traffic Lights
Initial Configuration
On MPLab, select ‘Production’ tab from the main menu and then clic ‘Set Configuration bits’. Select the following options:
#pragma config FOSC = INTOSCIO  // Oscillator Selection bits (INTOSCIO oscillator: I/O function on RA4/OSC2/CLKOUT pin, I/O function on RA5/OSC1/CLKIN)
#pragma config WDTE = OFF       // Watchdog Timer Enable bit (WDT disabled)
#pragma config PWRTE = ON       // Power-up Timer Enable bit (PWRT enabled)
#pragma config MCLRE = OFF      // MCLR Pin Function Select bit (MCLR pin function is digital input, MCLR internally tied to VDD)
#pragma config CP = OFF         // Code Protection bit (Program memory code protection is disabled)
#pragma config CPD = OFF        // Data Code Protection bit (Data memory code protection is disabled)
#pragma config BOREN = ON       // Brown Out Detect (BOR enabled)
#pragma config IESO = OFF       // Internal External Switchover bit (Internal External Switchover mode is disabled)
#pragma config FCMEN = ON       // Fail-Safe Clock Monitor Enabled bit (Fail-Safe Clock Monitor is enabled)

// #pragma config statements should precede project file includes.
// Use project enums instead of #define for ON and OFF.

#include <xc.h>
Configuration Function
Pins
Let's determine the functionality of each pin, located in the config() function. Establish all the Port C and pin 2 from Port A as output with the registers TRISA and TRISC. Also disconnect the Analog-to-Digital and Comparators features using the registers as shown in the code below. A couple of screenshots were taken from the datasheet.


//Pin Configuration
    TRISA = 0b111011; //RA5 to RA0.
    TRISC = 0b000000; //RC5 to RC0.
    PORTA = 0; //Clean PORTA
    PORTC = 0; //Clean PORTC
    ANSEL=0; //Transforms ALL analog pins into digital I/O pins
    CM2=1; CM1=1; CM0=1; //Turns off the Comparators
    CCP1M3=0; CCP1M2=0; CCP1M1=0; CCP1M0=0; //Capture/Compare/PWM is turned off
    ADON=0; //Turn off the Analog to Digital module
Timer 0 and Timer 1
Make sure that you have read how Timer 0 and Timer 1 are configured. Click here to read about timers.
//Timer 0 configuration
    T0CS=0; //Timer 0 Clock Source bit
    PSA=0; //Prescaler Assignment bit
    PS2=1; PS1=0; PS0=0; //Prescaler Rate bits
    TMR0=100; //Stablish a time base (done with the Timer 0 calculator)
    TMR0IF=0; //Reset the interrupt flag
    TMR0IE=1; //Set the enable flag
//Timer 1 configuration
TMR1CS = 1; //Select the external 32KHz oscillator
T1OSCEN=1; //Enable the oscillator
nT1SYNC=1; //There is no need to sync the external clock input for this circuit
T1CKPS1=0; T1CKPS0=0; //Prescaler of Timer 1
TMR1H=0x80; //TMR1 initial value for 1 second count
TMR1L=0x00; //Needed?
TMR1IF = 0; //Reset the interrupt flag
TMR1IE = 1; //Set the enable flag
TMR1ON = 1; //Turn on the counting in the Timer 1Interrupts
Without this activation, no timer would be useful!
//Enable the interrupts
    PEIE=1; //Enable the peripheral interrupts
    GIE=1; //Enable all the interrupts
Global Variables
The variables where the information about the lights and the state of the sequence are stored. This has to accessed from anywhere in the program; some of them are going to be used by Timer 0 and Timer 1.
Every red and yellow light has their variable. Green light wasn't considered since they are the opposite of the red light, always. The turn and sequence variables are used in the timers to know the position of the loop.
The macros (#define) are used to give a nickname to the ports implemented to control the information of the lights and the traffic lights.
unsigned char lightRed1=1, lightRed2=1, lightRed3=1, lightRed4=1, lightYellow1=1, lightYellow2=1, lightYellow3=1, lightYellow4=1; //Variable of the Lights
unsigned char turn=0; //which traffic light should be turned on?
unsigned char sequence=0; //which lights should be turned on?

//Definition macros of the Traffic Lights
#define device1 PORTCbits.RC0
#define device2 PORTCbits.RC1
#define device3 PORTCbits.RC2
#define device4 PORTCbits.RC3

//Definition macros of the Variables of each light
#define portRed PORTCbits.RC4
#define portYellow PORTCbits.RC5
#define portGreen PORTAbits.RA2
Functions Prototypes
Required by the compiler.
void config(void); //Function for the initial Configuration
void Routine_Tmr0(void); //Function for the routine for Timer 0
void Routine_Tmr1(void); //Function for the routine for Timer 1
Interrupt Function
If you haven’t read about the Interrupt Sources or how to handle Functions in C, check them out first.
Create the function called void __interrupt(void) interruptFunction(). From this place, all the interrupts are handled. Specify the enable bit and flag bit in order to enter the function. In addition, write the Routine_Tmr0() to specify where it should go next if Timer 0 requires the attention.
void __interrupt() interruptFunction() { //Interrupt Sources
    GIE = 0; //disable global interrupts

    //Timer 0
    if (TMR0IE && TMR0IF) { //If it has been enabled and if its flag has been set.
        TMR0IE = 0; //Disable Timer 0 interrupt
        Routine_Tmr0(); //Routine
        TMR0IF = 0; //Once attended, erase the interrupt flag from Timer 0
        TMR0IE = 1; //Enable Timer 0 interrupt
    }
Timer 0
In the beginning, all traffic lights are turned off and the information of the lights are loaded, which are RED, YELLOW and the opposite of RED which is treated as green. Finally, the traffic lights are lighted again and now they carry new information. This process repeats itself in each interrupt. Because it is so fast, you can't notice it.
void Routine_Tmr0() {
    //Each turn, one traffic light in turned on and the information related (RED, YELLOW and GREEN) is loaded to it

    unsigned int x=0; //variable for delay
    device1=0; device2=0; device3; device4=0;

    //Traffic Light 1
    if (turn==0) {
        portRed=lightRed1; portYellow=lightYellow1; portGreen=!lightRed1;
        device1=1; device2=0; device3=0; device4=0;

    }
Timer 1
Every second, the traffic light advances in the sequence of a typical traffic light.
void Routine_Tmr1() {
    //Each sequence turns on and off the RED, YELLOW and GREEN lights of the traffic light.
    //Sequence 1
    if (sequence==0) {
        lightRed1=1; lightRed2=0; lightRed3=1; lightRed4=0;
        lightYellow1=0, lightYellow2=0, lightYellow3=0, lightYellow4=0;
    }
Extra Coding
Don’t forget to add the While(1) in the Main function to make it run forever!
while(1) {

}
Download the code of the Multiplexing Traffic Lights
If you would like to see and read the whole code through, enter your name and e-mail in the form below to download the project. I promise that I won't send you spam; just relevant content to the blog. If you don't see any form below, please click here.
Testing the Multiplexing Traffic Lights
If you don't know how to compile and code a project into a PIC microcontroller, follow this link to my tutorial.
If everything executed properly, you should see a message in the bottom of the Output window confirming that the programming process has been complete.
Photo
A picture of the circuit was taken as reference.

Video
Although in the video the LEDs appears to blink, to the human eye it is imperceptible.
But it gets better. See the full tutorial on YouTube.
Conclusion
The schematic design and the writing of code are expressed in this post. Furthermore, a video and foto are shown so it gives evidence how the circuitry looks like and works.
Resources
- 8-bit microcontroller PIC16F684 datasheet. Link.
- PIC16F684 cannot get ports RC3 RC2 RC1 RC0 to work as input. Link.
- C Language: #define Directive (macro definition). Link.
You have reached this far!
Thank you for reading the blog post. Your comments and suggestions are welcomed. At the bottom of this page, leave a message or just say hi! The whole team of techZorro will appreciate it. Don't forget to share it on social media as well.
techZorro’s Index of Content
Click on the following link to browse likewise content in the blog in techZorro. This index will help you see what you are looking for in a bird’s eye view.
techZorro's Newsletter!
If you enjoyed this blog post, please subscribe to techZorro’s newsletter so you don’t miss any future blog posts!
techZorro's Index of Content
Keep Reading!
- 008 – Variable Frequency Drives: how this controller can transform induction motors forever
 AC induction motors can be transformed into a highly controllable machine with Variable Frequency Drives or VFD. Click here to listen.
 - 006 – Regenerative Braking, an awesome Feature found in Electric MotorsThis episode is related to this hidden feature of electric motors called regenerative braking. Click here to listen.
- 005 – 7 types of Electric Motors that you should know aboutThere are several types of electric motors that differs in efficiency, power, cost, torque output, etc. Click here to listen.
- 004 – AC Voltages, Frequencies and Plugs around the WorldLet's talk about electricity! Specifically about how the standards around the world. Click here to listen.
- 002 – RISC vs CISC, how a few Differences are crucial to ComputingToday in the market is found two kinds of processor architectures: RISC and CISC. Both have some advantages. Click here to listen.